Automatic Deploy Angular 2 App to Azure Web App
Wade HuangAzure Web App supports pull source from version control server like Github and TFS. And it also listens a branch. It pull new source automatically when there is a new commit pushing to the branch. But by default, Azure Web App only recognizes ASP.NET projects, it doesn’t build Angular 2 App. Therefore, we needs some customization.
1. Setup Azure Web App
After creating an Web App, go to Deployment options and follow the wizard to connect a source.
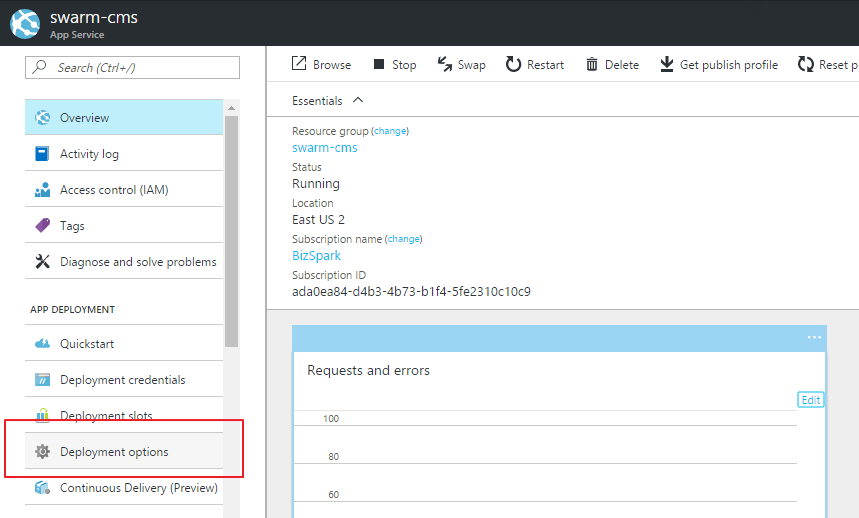
Once it settles, you can see the whole files are copied to the root of wwwroot(on the end will tell you how to see files). This result isn’t what we want because Angular 2 Apps use Typescript, they need to be complied.
2. Add .deployment and custom command.
Azure Web App uses Kudu for deploying app from version control. Kudu reads the .deployment when it pulls the source every time. So we can add commands to build Angular 2 Apps.
2.1 Add .deployment on the root of repository and add the following script.
[config]
command = deploy.cmd
For more info
2.1 Add the custom command file(this samples use deploy.cmd) and add the following script.
@echo off

echo start deploying
cd client-app
IF %ERRORLEVEL% NEQ 0 goto error

echo installing packages
call npm install
IF %ERRORLEVEL% NEQ 0 goto error

echo building angular app
call node node_modules\@angular\cli\bin\ng build -prod
IF %ERRORLEVEL% NEQ 0 goto error

echo removing old files
rm -rf %DEPLOYMENT_TARGET%/*
IF %ERRORLEVEL% NEQ 0 goto error

echo copying web.config
xcopy web.config %DEPLOYMENT_TARGET%
IF %ERRORLEVEL% NEQ 0 goto error

echo copying app
xcopy dist %DEPLOYMENT_TARGET% /S
IF %ERRORLEVEL% NEQ 0 goto error

goto end

:error
cd ..
echo An error has occured during web site deployment.
exit /b 1

:end
cd ..
echo Finished successfully.
This script runs npm install and ng build -prod then copy the distribution to %DEPLOYMENT_TARGET%. You have to change cd client-app to the folder of your Angular 2 App in the repository. Also you can add more commands if you need to.
3. Add Routing Rule on web.config
By default, the path of HTTP request matches the path of the folder, but the Angular 2 app handles the routing itself. Therefore, we need to tell the server(IIS) by this web.config to re-route almost every requests to root(/index.html).
<?xml version="1.0" encoding="utf-8"?>
<configuration>
  <system.webServer>
    <rewrite>
      <rules>
        <rule name="Angular Routes" stopProcessing="true">
          <match url=".*" />
          <conditions logicalGrouping="MatchAll">
            <add input="{REQUEST_FILENAME}" matchType="IsFile" negate="true" />
            <add input="{REQUEST_FILENAME}" matchType="IsDirectory" negate="true" />
            <add input="{REQUEST_URI}" pattern="^/(api)" negate="true" />
          </conditions>
          <action type="Rewrite" url="/" />
        </rule>
      </rules>
    </rewrite>
    <staticContent>
      <remove fileExtension=".otf" />
      <remove fileExtension=".woff" />
      <remove fileExtension=".woff2" />
      <remove fileExtension=".json" />
      <mimeMap fileExtension=".otf" mimeType="application/font-otf" />
      <mimeMap fileExtension=".woff" mimeType="application/font-woff" />
      <mimeMap fileExtension=".woff2" mimeType="application/font-woff2" />
      <mimeMap fileExtension=".json" mimeType="application/json" />
    </staticContent>
  </system.webServer>
</configuration>
By default IIS blocks almost everything, use <staticContent> section to tell IIS what files can be downloaded.
Summary
Add these three files. If the names of files or folders you use are different, you have to change scripts.
/client-app/web.config
/.deployment
/deploy.cmd
Now you can enjoy your app and this idea can apply to others like Ember App.
Debuging
Wait!! Something go wrong. The app cannot run. This section tells you how to debug it.
In the portal of your web app. Type tools in search bar or scroll to the end then go to Advanced Tools
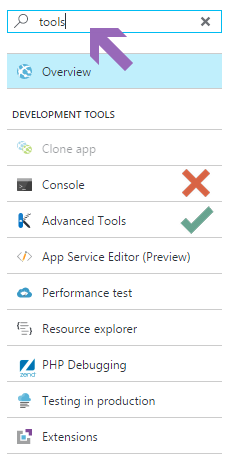
Advanced Tools has better web console, so don’t go to the Console in the portal.
Advanced Tools
Go to Debug console, you can see the file explorer on the top and the console the bottom.
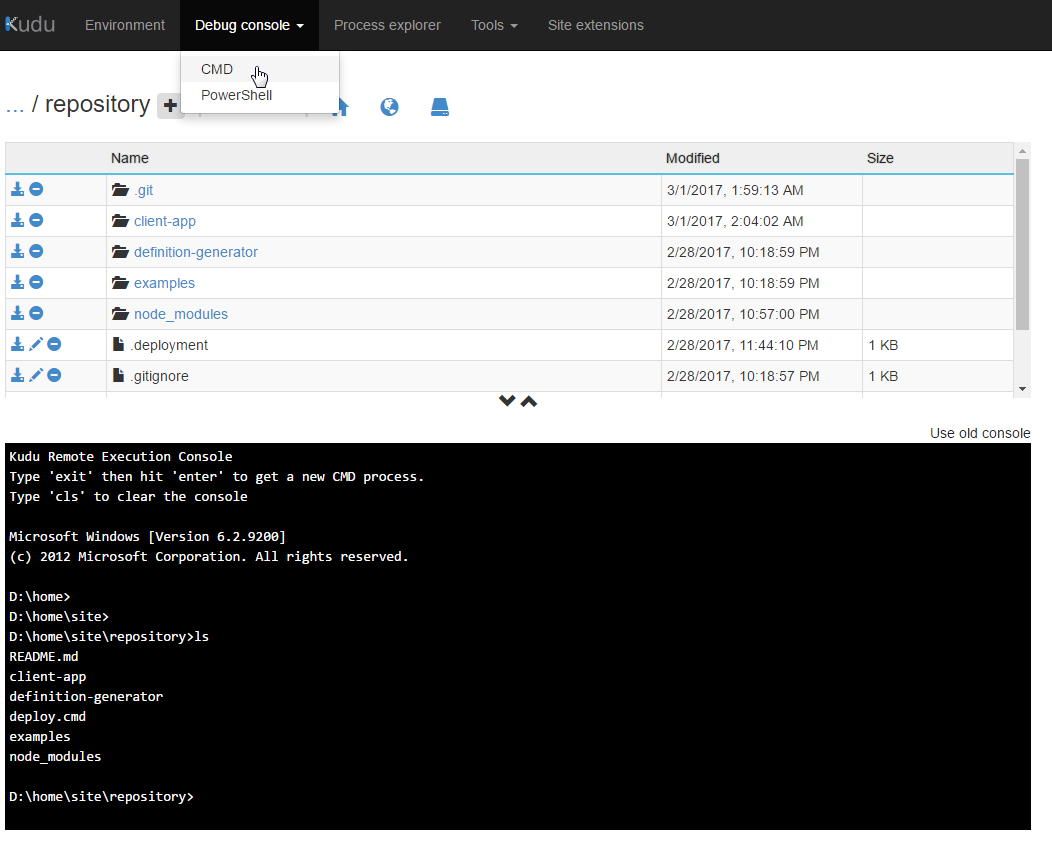
/site/deployments   contains the deployment logs
/site/wwwroot       contains the built files of the app
/site/repository    contains the source files of the project
In the console, you can see the logs, maintain files and run commands to help you debug your app.